How to Properly Specify Polished Concrete for a Project
Why Proper Polished Concrete Specifications Matter
Polished concrete might look simple, but getting it right takes planning, precision, and the right specs from the start. If the concrete mix isn’t designed for polishing, or if placement and finishing aren’t done correctly, you’ll end up with a floor that’s blotchy, weak, or just plain ugly—and once it’s poured, there’s no fixing a bad slab.
That’s why architects, designers, and specifiers need to understand how to properly write specs for polished concrete. From choosing the right mix design to ensuring the right curing and polishing procedures, every detail matters. This guide will break it all down, step by step, so your next polished concrete project turns out exactly how you planned.
📌 Table of Contents
1️⃣ What is Polished Concrete & Why It’s Different
How polished concrete is created
Key benefits for architects and designers
Why it requires specific mix and finishing techniques
2️⃣ Specifying the Right Concrete Mix for Polishing
Strength and PSI requirements
Water-to-cement ratio and why it matters
Choosing the right aggregates for exposure levels
Cement types and supplementary cementitious materials (SCMs)
3️⃣ Placement & Finishing Requirements for Polished Concrete
Best practices for pouring and finishing
Why over-troweling ruins polished concrete
Curing techniques for consistent hardness and polishability
4️⃣ The Polishing Process: Understanding Grit Levels & Sheen Options
How grinding, densifying, and polishing work together
Matte, satin, and high-gloss finishes—what to specify
5️⃣ Common Mistakes in Polished Concrete Specifications
What goes wrong when specs aren’t detailed enough
Misconceptions about polished concrete that lead to failure
6️⃣ Why Work With Ayala’s Concrete Designs for Your Specs
How Ayala’s Concrete Designs helps architects and designers specify polished concrete correctly
Ensuring long-term durability, performance, and visual appeal
7️⃣ Get Expert Help with Your Polished Concrete Specs
Why early consultation with an expert contractor is critical
Contact Ayala’s Concrete Designs for polished concrete project assistance
1️⃣ What is Polished Concrete & Why It’s Different
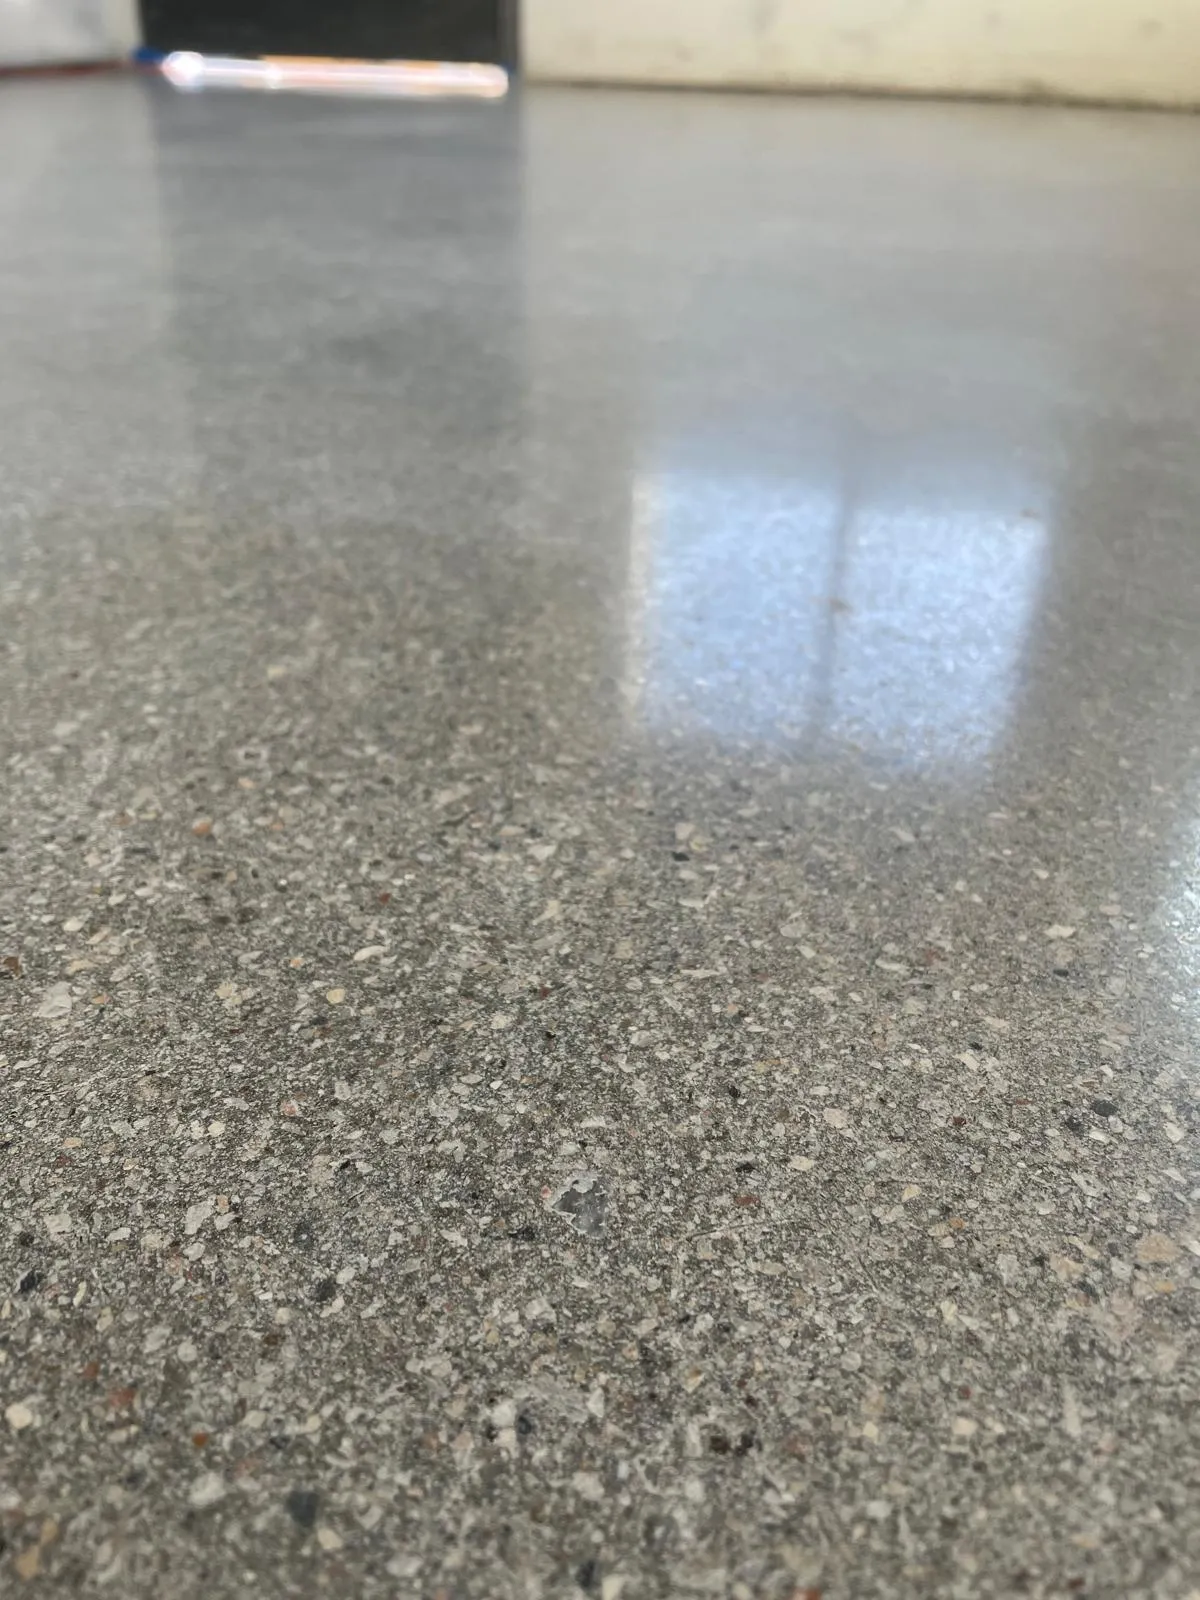
Polished concrete isn’t just regular concrete with a shine on top—it’s a fully refined, mechanically processed surface that goes through multiple steps to achieve a durable, smooth, and long-lasting finish. Unlike coatings or sealants that sit on the surface, polished concrete enhances the actual concrete slab itself, making it a low-maintenance, high-performance flooring solution.
How Polished Concrete is Created
Polished concrete is achieved through a multi-step grinding and polishing process using industrial diamond abrasives. The final appearance and performance depend on three key factors:
The Concrete Mix Design – If the mix isn’t designed for polishing, the final result will be weak, inconsistent, or prone to failure.
The Finishing and Curing Process – A poorly finished slab will lead to burn marks, soft spots, or uneven coloration that can’t be fixed during polishing.
The Polishing Process – Using the right grit levels, densifiers, and sealers ensures a smooth, durable, and high-gloss finish that lasts for decades.
Because polished concrete is the actual concrete surface, the quality of the mix and installation determines how well it polishes. If mistakes are made during placement, they will show up permanently once the floor is polished.
Key Benefits for Architects and Designers
Polished concrete offers several advantages over traditional flooring materials, making it a popular choice for commercial, industrial, and even high-end residential projects.
Extreme Durability – Lasts decades with minimal maintenance.
Low Maintenance – No need for waxing, coatings, or frequent refinishing.
Sustainability – No additional materials required, contributing to LEED certification and green building initiatives.
Customizable Aesthetic – Can be matte, satin, or high-gloss, with optional stains and exposed aggregates.
Cost-Effective – Lower long-term costs compared to coatings, tiles, or vinyl.
Why Polished Concrete Requires Specific Mix and Finishing Techniques
One of the biggest misconceptions about polished concrete is that any standard concrete mix will work. The truth is, if the mix isn’t designed for polishing, the project is doomed from the start.
Too much water in the mix leads to a weak, porous surface that won’t polish well.
Poorly placed or over-troweled concrete creates inconsistent finishes that result in blotchy, uneven polish.
If the right aggregates aren’t selected, the final appearance won’t match the design intent.
For polished concrete to turn out right, it has to be specified correctly from the beginning. That starts with choosing the right mix design, ensuring proper placement, and following correct polishing procedures—all of which we’ll cover in the next sections.
2️⃣ Specifying the Right Concrete Mix for Polishing
Polished concrete starts with the right mix design. If the mix isn’t designed for polishing, the final result will be weak, inconsistent, or nearly impossible to finish properly. Architects, designers, and specifiers must ensure that the concrete mix meets specific strength, density, and workability requirements before it is ever poured.
Strength and PSI Requirements
The compressive strength of the concrete directly impacts its durability and polishability.
3,500–5,000 PSI minimum is recommended for polished concrete.
Higher strength concrete (above 5,000 PSI) produces a denser, more abrasion-resistant surface.
Soft concrete (below 3,500 PSI) is more difficult to polish and will not hold up to heavy traffic.
Higher PSI concrete densifies better and allows for a smoother, more reflective finish. If the mix is too soft, the polishing process will expose surface imperfections, dusting issues, and uneven hardness.
Water-to-Cement Ratio and Why It Matters
The water-to-cement (W/C) ratio is one of the most critical factors in achieving a strong, durable polished concrete surface.
Ideal W/C Ratio: 0.40 – 0.45
Too much water (above 0.50) weakens the concrete, leading to porosity, shrinkage, and surface dusting.
Too little water (below 0.40) can make the mix difficult to place and finish.
A low W/C ratio produces a denser, more polishable slab that resists stains, abrasion, and moisture penetration.
Choosing the Right Aggregates for Exposure Levels
Aggregate selection plays a major role in the final aesthetic of polished concrete. Specifiers must define the desired level of exposure in the specification documents.
Cream Finish (Minimal Exposure) – The surface paste is polished with no visible aggregate. Requires precise finishing to avoid burn marks or trowel inconsistencies.
Salt & Pepper Finish (Medium Exposure) – Fine aggregates are slightly exposed, giving the floor a smooth, speckled appearance.
Full Aggregate Exposure – Larger stones and aggregates are fully exposed, creating a high-end terrazzo-style appearance. Requires deep grinding.
The type of aggregate also matters. Hard aggregates such as crushed quartz, granite, or limestone polish well, while soft stones like sandstone break down too easily during the grinding process.
Cement Types and Supplementary Cementitious Materials (SCMs)
The type of cement and additional materials used in the mix can affect color, strength, and polishing characteristics.
Ordinary Portland Cement (OPC) Type I or II – The standard choice for polished concrete. Provides consistent strength and finishability.
Fly Ash – Improves workability and durability but can affect final color. Should be limited to 20-30% replacement to avoid excessive softness.
Silica Fume – Enhances strength and surface hardness, making the concrete more polishable.
Slag Cement – Increases long-term durability and density, reducing porosity.
Pozzolans & Metakaolin – Reduces permeability and shrinkage, improving the overall integrity of the concrete slab.
A well-balanced blend of SCMs can improve density, reduce shrinkage, and enhance polishability, but overuse of certain materials (especially high fly ash content) can make the slab difficult to grind and polish properly.
Why Specifying the Right Mix Design is Critical
If the concrete mix isn’t designed correctly from the start, there’s no fixing it later. Architects and specifiers must work closely with experienced polished concrete contractors to ensure:
✔ Proper PSI and W/C ratio for a durable, dense slab.
✔ Correct aggregate selection based on the desired exposure level.
✔ Balanced cementitious materials to achieve the right strength and polishability.
With the right mix in place, the next step is proper placement and finishing—because even the best mix design can be ruined by poor finishing techniques.
3️⃣ Placement & Finishing Requirements for Polished Concrete
Even with the perfect mix design, poor placement and finishing can ruin a polished concrete project before polishing even begins. If the slab isn’t placed, finished, and cured properly, you’ll end up with burn marks, uneven hardness, surface defects, or an inconsistent polish.
Architects and specifiers need to outline strict placement and finishing requirements in the project specs to ensure the final polished concrete floor meets performance and aesthetic expectations.
Proper Concrete Placement Techniques
Concrete placement must be controlled and consistent to avoid issues like segregation, surface defects, or strength inconsistencies.
Concrete should be placed at a consistent rate to avoid cold joints or uneven curing.
Use low-slump concrete and controlled vibration to prevent segregation.
Avoid excessive reworking of the surface—too much manipulation weakens the finish.
Ensure proper grading and leveling to avoid dips, humps, or variations in floor height.
The smoother and more uniform the initial placement, the better the final polished surface will be.
Troweling Best Practices for Polished Concrete
Troweling is where many polished concrete projects go wrong. Over-troweling, improper finishing techniques, or burn marks will permanently affect the final polish.
Float the surface before starting troweling to ensure uniform paste distribution.
Avoid over-troweling—too many passes with a steel trowel can cause burn marks, densification inconsistencies, and surface irregularities that are impossible to remove later.
Keep finishing consistent across the slab to avoid visible differences in sheen and color after polishing.
If a "cream finish" is desired, extra care must be taken during troweling to avoid overworking the surface.
If a "salt and pepper" or full aggregate exposure finish is specified, excessive troweling is unnecessary—the top layer will be ground off anyway. Just ensure a good floor flatness level.
A poorly finished slab will always result in a poor polished concrete floor, no matter how skilled the polishing contractor is.
Curing Techniques for Consistent Hardness & Polishability
Curing is critical—if the slab doesn’t cure properly, you’ll end up with soft spots, dusting, or uneven hardness, making polishing a nightmare.
Wet curing is the best method for achieving a strong, dense surface.
Avoid curing compounds unless they are 100% removable—many curing agents leave behind residues that interfere with polishing.
Curing should last at least 7 days, but 28 days is ideal for full-strength development before polishing.
Rapid drying should be avoided, as it leads to shrinkage cracking and surface weakness.
A properly cured slab produces a harder, more durable surface that will take a more uniform polish with fewer defects.
How Placement & Finishing Affect the Final Look
Architects and designers need to understand that the final appearance of polished concrete is heavily influenced by the placement and finishing process.
✔ Overworked or over-troweled slabs may develop inconsistent gloss and color variations.
✔ Slabs that are not properly cured may have soft areas that won’t polish evenly.
✔ Poorly placed concrete may result in dips, waves, or height variations that make polishing difficult.
✔ Using the wrong mix for the specified exposure level (cream, salt & pepper, or full aggregate) can lead to unwanted results.
A polished concrete project is only as good as the slab it starts with—and that’s why proper placement, finishing, and curing must be detailed in the specs to avoid costly mistakes later.
With the slab in place and properly finished, the next step is the actual polishing process, which involves multiple passes with industrial diamond abrasives to achieve the desired gloss and finish.
4️⃣ The Polishing Process – Understanding Grit Levels & Sheen Options
Once the concrete has been properly placed, finished, and cured, it’s time for the actual polishing process. This is where the surface is mechanically refined using progressively finer diamond abrasives to achieve the desired level of smoothness and reflectivity.
Architects and specifiers need to understand how the polishing process works, what grit levels correspond to different sheens, and what densifiers and sealers should be used to achieve the best results.
How Polishing Works: The Step-by-Step Process
Polishing isn’t a one-step grind and done process—it involves multiple stages, with each step refining the surface further.
1️⃣ Initial Grinding (Metal-Bond Diamonds, 30-80 Grit)
Removes surface imperfections, coatings, or laitance.
If an aggregate-exposed finish is specified, deep grinding is required at this stage.
Ensures a flat, even starting surface before finer polishing begins.
2️⃣ Intermediate Grinding & Densification (Resin-Bond Diamonds, 100-400 Grit)
Begins refining the surface to a smoother finish.
Densifiers are applied at this stage to harden and strengthen the concrete.
Helps reduce dusting and increases abrasion resistance.
3️⃣ Polishing to Desired Sheen (800-3,000 Grit)
Fine-grit diamonds further refine the surface, increasing gloss and reflectivity.
Higher grits (1,500+) produce a high-gloss, mirror-like finish.
Lower grits (400 and below) create a satin or matte finish.
4️⃣ Final Sealing & Burnishing
A penetrating sealer enhances stain resistance without forming a surface film.
Burnishing at high speeds with a polishing pad further enhances the shine.
Each step must be completed thoroughly to avoid hazy, uneven, or blotchy areas in the final floor.
Grit Levels & Gloss Options – What to Specify
Polished concrete can range from a natural matte look to a full-gloss mirror finish, depending on how far the polishing process is taken. Specifiers need to define the target finish in project documents.
Matte Finish (200 Grit) – Low-sheen, smooth but not reflective. Best for industrial spaces and areas with heavy traffic.
Satin Finish (400 Grit) – Soft, low-gloss finish with a slight reflection. Works well in offices, retail spaces, and showrooms.
High-Gloss Finish (1,500+ Grit) – Glass-like reflectivity. Ideal for high-end commercial spaces, lobbies, and modern interiors.
Skipping grits or rushing the process will result in inconsistent sheen and visible swirl marks.
The Role of Densifiers & Sealers in Polished Concrete
Densifiers and sealers play a critical role in strengthening and protecting polished concrete.
✔ Densifiers (Lithium, Sodium, or Potassium-Based)
Chemically reacts with the concrete to increase surface hardness and abrasion resistance.
Lithium-based densifiers are preferred for low-maintenance, high-gloss finishes.
✔ Penetrating Sealers (Non-Film-Forming Sealers)
Protects against staining and moisture absorption.
Allows concrete to breathe, preventing trapped moisture issues.
Avoid topical coatings—they interfere with the natural polish and wear unevenly.
Proper densification and sealing ensure long-term durability, reducing maintenance needs and enhancing stain resistance.
Why Specifying the Correct Polishing Process Matters
If the wrong grit levels, densifiers, or sealers are used, the final polished concrete floor won’t meet performance expectations. Specifiers should:
✔ Define the target grit level and finish sheen.
✔ Specify densifier application at the right stage of polishing.
✔ Avoid topical coatings that alter the natural finish.
✔ Work with an experienced polishing contractor to ensure proper execution.
A polished concrete floor is only as good as the polishing process itself—skipping steps or using improper techniques will result in subpar performance and appearance.
Disclaimer: Gloss Levels Can Vary
Even when the same grit levels and polishing process are specified, the final gloss and reflectivity can vary due to factors like concrete mix composition, finishing techniques, and site conditions.
Concrete is not a manufactured product—it’s a unique surface that reacts differently to polishing, even within the same project.
For the best results, it’s important to work closely with an experienced polished concrete contractor who understands how to adjust the process on-site to achieve the intended look. Sometimes, a little flexibility in the polishing procedure is necessary to produce the best outcome based on the condition of the slab.
A professional contractor knows when to extend or adjust polishing steps to improve uniformity and enhance the final appearance. Instead of relying purely on specified grit numbers, it’s best to collaborate with a trusted expert who can fine-tune the process for optimal results.
5️⃣ Common Mistakes in Polished Concrete Specifications
Polished concrete is one of the most durable, low-maintenance flooring solutions available, but only when it’s specified correctly from the start. When architects and designers don’t account for concrete mix requirements, finishing techniques, or polishing process details, the final result can be disappointing—or worse, a complete failure.
Here are the most common mistakes in polished concrete specifications and how to avoid them.
❌ 1. Specifying the Wrong Concrete Mix
A polished concrete floor is only as good as the slab it starts with. If the mix isn’t designed for polishing, the final result will be weak, porous, or difficult to finish properly.
Common Issues:
Too much water in the mix (high W/C ratio) leads to a weak, dusty surface that won’t polish well.
Low PSI concrete (under 3,500 PSI) results in a soft surface that wears down quickly.
Inconsistent aggregates can create uneven exposure and color variations.
How to Avoid It:
✔ Specify 3,500-5,000+ PSI concrete for polished floors.
✔ Keep the W/C ratio between 0.40-0.45 for strength and density.
✔ Choose high-quality, durable aggregates for even exposure.
❌ 2. Failing to Define Aggregate Exposure & Finish Level
Many specifications fail to clarify what level of aggregate exposure or polish sheen is expected. This can lead to miscommunication between designers and contractors, resulting in a finish that doesn’t match the client’s expectations.
Common Issues:
Some projects require a cream finish, while others need salt & pepper or full aggregate exposure. Without defining this, contractors may grind too deep or not enough.
Polishing gloss levels vary from matte (400 grit) to high-gloss (1,500+ grit)—but if not specified, the contractor is left to guess.
How to Avoid It:
✔ Clearly specify aggregate exposure levels (cream, salt & pepper, or full exposure).
✔ Define final gloss level (matte, satin, or high-gloss).
✔ Include sample images or reference slabs for accurate expectations.
❌ 3. Improper Placement & Finishing Techniques
A poorly placed or finished slab will make polishing difficult—or even impossible. If the concrete is overworked, improperly floated, or cured incorrectly, it will show defects that can’t be removed.
Common Issues:
Over-troweling creates burn marks and surface inconsistencies that show up in the final polish.
Uneven placement leads to waves, dips, or variations in hardness.
Curing compounds that aren’t fully removed can interfere with polishing.
How to Avoid It:
✔ Require consistent placement and troweling methods in the spec.
✔ Avoid over-troweling if a cream finish is desired.
✔ Use wet curing instead of chemical curing compounds whenever possible.
❌ 4. Assuming All Polished Concrete is the Same
Not all polished concrete looks or performs the same. Two slabs placed under different conditions, even with identical specs, can produce slightly different finishes.
Common Issues:
Expecting every polished floor to have the same reflectivity when site conditions vary.
Assuming all densifiers and sealers work the same—they don’t.
Overlooking the impact of concrete age and mix variations on final appearance.
How to Avoid It:
✔ Allow flexibility in the spec for minor adjustments during the polishing process.
✔ Work closely with an experienced contractor to fine-tune polishing based on slab conditions.
✔ Test a mock-up area before committing to the full polishing process.
❌ 5. Overlooking Maintenance & Long-Term Performance
Many specs focus only on installation and forget that maintenance is key to keeping polished concrete looking its best.
Common Issues:
No mention of regular cleaning practices—leading to surface wear and dulling.
Using harsh chemicals that damage the densifier and finish.
Failing to plan for reapplication of penetrating sealers over time.
How to Avoid It:
✔ Specify neutral pH cleaners for long-term care.
✔ Educate building owners about the importance of routine maintenance.
✔ Consider a maintenance program to preserve polish longevity.
The Importance of Writing a Detailed Polished Concrete Specification
A clear, well-defined specification is the best way to ensure a successful polished concrete installation. It eliminates confusion, prevents costly mistakes, and ensures the final floor meets performance and aesthetic expectations.
✔ Define the concrete mix requirements (PSI, W/C ratio, aggregate type).
✔ Specify the exact level of polish and exposure to avoid surprises.
✔ Include proper finishing and curing requirements to create an optimal slab for polishing.
✔ Work with a knowledgeable contractor to refine the specification for real-world conditions.
Polished concrete is a long-term investment, and a properly written spec makes all the difference in its performance, durability, and appearance.
With the common mistakes covered, the next section will showcase how Ayala’s Concrete Designs helps architects and designers get polished concrete right from the start.
6️⃣ Why Work With Ayala’s Concrete Designs for Your Specs
Specifying polished concrete correctly takes more than just writing down a few grit levels and hoping for the best. It requires knowledge of concrete mix design, placement techniques, finishing methods, and the right polishing process. That’s where Ayala’s Concrete Designs comes in.
With years of experience working on high-end polished concrete projects, we collaborate with architects, designers, and specifiers to ensure every project is set up for success from day one.
✔ Early Collaboration Prevents Costly Mistakes
One of the biggest reasons polished concrete projects fail is poor communication between designers, contractors, and specifiers. If the specifications aren’t clear—or worse, if the slab is poured incorrectly—there’s no going back once polishing starts.
That’s why early consultation is critical. When Ayala’s Concrete Designs is brought in at the beginning of a project, we help with:
Reviewing mix designs to ensure they meet PSI, W/C ratio, and aggregate exposure requirements.
Guiding finishing teams to prevent over-troweling, burn marks, or surface inconsistencies.
Advising on curing methods to produce the best possible polishing conditions.
Adjusting polishing techniques on-site to achieve the expected finish.
This upfront planning ensures that when it’s time to polish, the floor meets both aesthetic and performance expectations.
✔ Expert Guidance on Polishing Sheen, Exposure, and Performance
Polished concrete isn’t just about grinding a slab and calling it done. Different environments require different levels of gloss, slip resistance, and durability.
Ayala’s Concrete Designs works with architects and designers to:
Determine the right level of aggregate exposure (cream, salt & pepper, or full exposure).
Choose the correct grit level based on the desired gloss and traffic demands.
Ensure the floor meets safety standards for slip resistance and wear.
Advise on densifiers and sealers to increase durability and stain protection.
Every project is different—that’s why polished concrete specifications need to be tailored to the exact needs of the space.
✔ Hands-On Experience = Better Specifications
Many polished concrete specifications are written by people who have never actually installed or polished concrete. The result? Specs that look good on paper but don’t work in the real world.
At Ayala’s Concrete Designs, we bring real-world experience into the spec-writing process. We know what works, what doesn’t, and how to prevent costly mistakes before they happen.
We’ve worked on everything from retail spaces and corporate offices to industrial warehouses and high-end residential projects.
We understand the challenges that come with different concrete mixes, placement methods, and environmental conditions.
We provide clear, detailed recommendations that ensure polished concrete meets both design and functional needs.
A polished concrete project is only as good as the team behind it—and having an experienced contractor involved from the start makes all the difference.
✔ On-Site Adjustments for the Best Final Finish
Even when a project is specified correctly, concrete is not a manufactured product—it’s poured on-site and reacts differently in every environment. That means minor adjustments may be necessary during the polishing process to get the best results.
A true polished concrete professional knows how to:
Fine-tune grit levels and polishing passes based on slab conditions.
Adjust exposure depth if the mix design or finishing varied slightly.
Apply densifiers and sealers strategically to enhance durability and aesthetics.
By allowing some flexibility in the process, Ayala’s Concrete Designs ensures that the final floor looks and performs as expected, even when real-world conditions aren’t perfect.
✔ Ready to Help with Your Next Polished Concrete Project
If you’re an architect, designer, or project planner looking for expert guidance on specifying polished concrete, Ayala’s Concrete Designs is ready to help. Whether you’re working on a commercial space, industrial facility, or high-end residence, we’ll make sure your specs are right from the start—saving you time, money, and headaches down the road.
With the right specifications in place, your project will have a flawless, long-lasting polished concrete floor that meets design, durability, and performance standards.
7️⃣ Get Expert Help with Your Polished Concrete Specs
Polished concrete is a long-term investment, and getting it right starts with proper specifications. When the mix design, placement, finishing, and polishing process are all carefully planned, the result is a high-performance, low-maintenance floor that lasts for decades.
But too often, architects and designers are left to figure it out on their own, relying on generic specs that don’t account for real-world variables. That’s where Ayala’s Concrete Designs comes in.
✔ Why Early Collaboration is Critical
If the polished concrete specification isn’t correct from the start, there’s no fixing it later.
✔ A bad mix design leads to weak, unpolishable concrete.
✔ Over-troweling or poor finishing techniques create surface defects that can’t be removed.
✔ Inconsistent curing leads to soft spots and uneven polish.
These avoidable mistakes cost time and money—and they often result in a final product that doesn’t meet client expectations.
That’s why working with a contractor before the slab is poured is essential.
✔ How Ayala’s Concrete Designs Can Help
At Ayala’s Concrete Designs, we don’t just polish concrete—we help architects and designers create specifications that work in the real world.
✔ Concrete mix design consulting – Get the right PSI, W/C ratio, and aggregate selection.
✔ On-site guidance during placement and finishing – Ensure the slab is properly prepped for polishing.
✔ Custom polish level and sheen recommendations – Tailored to your project’s specific needs.
✔ Densifier, sealer, and maintenance planning – For long-term durability and performance.
Whether you’re working on a commercial space, industrial facility, or high-end residence, we make sure your polished concrete floors are built to last.
✔ Contact Ayala’s Concrete Designs Today
If you’re planning a project that includes polished concrete, don’t leave the specs to chance. Get expert guidance from a team that understands the entire process, from mix design to final polish.
📞 Call Ayala’s Concrete Designs at 435-229-7314
📧 Email us at [email protected]
Let’s make sure your next polished concrete project is done right from the start!