Six Costly Polishing Mistakes That Can Ruin Your Concrete Floor in St. George, UT—Insights from Ayala’s Concrete Designs
“An industry report by the Concrete Polishing Council indicates that demand for polished concrete in both commercial and residential markets has grown steadily, thanks to its durability, reflectivity, and ease of maintenance.”
In sunny St. George, UT, the housing market has been booming. New builds and renovations frequently feature polished concrete flooring that merges form and function. From trendy retail stores to spacious homes, I’ve witnessed a surge in interest for that reflective, minimalist look. Still, not everyone who embarks on a polishing project ends up thrilled with the outcome. Some see uneven gloss, swirl marks, or problems with moisture that lead to long-term headaches like efflorescence.
After years of field experience at Ayala’s Concrete Designs, I can pinpoint several common reasons why these floors miss the mark. Below, I’ll walk you through six mistakes that can undermine your polishing efforts—from ignoring moisture content to rushing the grit sequence. Avoid these pitfalls, and you can ensure your polished concrete in St. George lives up to its potential as a showpiece floor that’s both stylish and hardworking.
(For direct assistance or more detailed queries, feel free to contact Ayala’s Concrete Designs: 435-229-7314 or [email protected]
1) Overlooking Moisture Content and Vapor Barriers
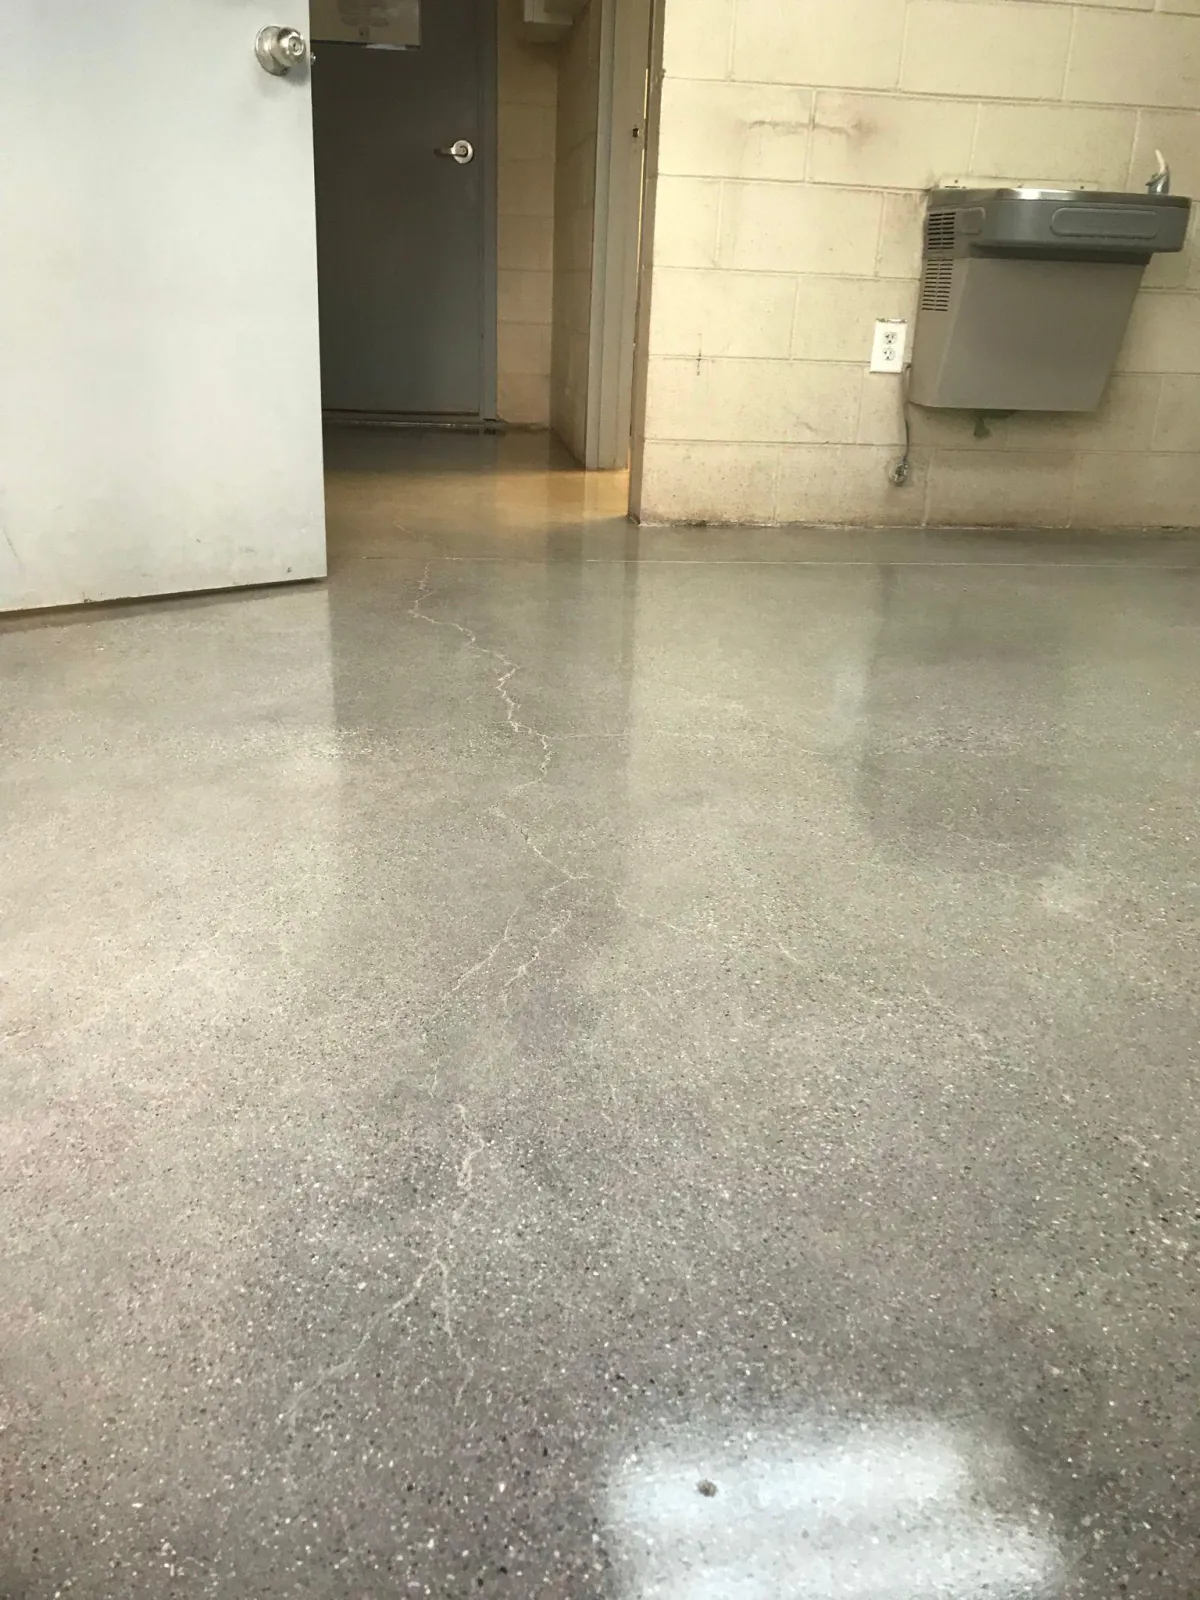
St. George may have a more arid climate compared to other regions, but that doesn’t mean moisture issues are off the table. Improperly sealed exterior walls, groundwater intrusion, or a missing vapor barrier beneath the slab can still allow moisture vapor to migrate upwards. That moisture doesn’t just evaporate harmlessly; it can interfere with densifier and stain guard penetration, leaving splotchy areas that refuse to take a shine.
Worse still, if there’s consistent upward moisture pressure, you might see efflorescence over time—a telltale white, powdery residue that forms when dissolved salts come to the surface. Once efflorescence appears, it often indicates a deeper, systemic moisture issue. If you suspect or discover dampness, pause your project until you’ve addressed the cause.
Practical Tip
Early Testing: Always perform a moisture test before polishing. If levels exceed recommended thresholds, investigate whether your slab has a functioning vapor barrier.
Multi-Step Fix: If no barrier exists, consider professional remediation—like installing a moisture mitigation system—before continuing.
2) Poor Crack and Joint Repair
Concrete floors often develop cracks or saw-cut joints. If left untreated or poorly repaired, these seams can ruin an otherwise immaculate polished surface. Polishing will highlight these imperfections rather than hide them. Think of it like shining a spotlight on every flaw.
If you’re dealing with hairline cracks, a specialized crack filler can seal them. For larger separations, you might need a semi-rigid joint filler that remains flexible but still protects against debris intrusion. The key is to ensure the filler bonds well with the concrete. Otherwise, traffic, thermal expansion, or humidity changes can break the bond, causing the filler to pop out.
Practical Tip
Color Matching: Many fillers come in various shades to match the concrete’s color. This helps create a seamless appearance.
Timing: Fill cracks or joints after your initial grinding passes, when the floor is open and contaminants are removed.
3) Sloppy Abrasive Progression
Skipping grit steps (like jumping from 50 grit to 200 grit) is a recipe for swirl patterns that no final polishing stage can fix. Polished concrete success hinges on each successive grit eliminating the scratches from the previous grit. Rush the process, and you’ll see “ghost lines” or a patchy shine at best.
St. George’s environment might lull some people into thinking the dryness allows for quick processing. But dryness won’t compensate for incomplete refinement. If you’re managing a large commercial space, map out your grit progression carefully. Trying to cut corners now usually leads to significantly more rework later.
Practical Tip
Stick to the Sequence: Typical sequences might be 30/40 -> 80 -> 150 -> 200 -> 400 -> 800+ grits, though it varies by slab hardness and desired gloss.
Spot Checks: After each grit level, focus a bright work light at a low angle to reveal any leftover scratches.
4) Inconsistent Densifier Application
Densifiers can make or break your polished concrete. They react with the slab’s free lime to create a harder, more reflective surface. But if you apply it unevenly, or if the floor still has too much moisture within, the results might be blotchy.
Another issue is timing. Apply densifier too early, and you risk locking in contaminants or interfering with subsequent grinding steps. Apply it too late, and the slab’s pores might already be so tight that penetration is minimal. Common practice is to start densifying once you’ve done at least one or two metal-bond passes. That way, the surface is open enough for the chemical reaction to occur.
Practical Tip
Uniform Coverage: Use a high-quality pump sprayer or microfiber applicator to ensure an even layer across the surface.
Dwell Time: Most densifiers need time to react. Avoid walking on or prematurely scrubbing areas before they’ve had a chance to penetrate.
5) Underestimating Edge and Corner Work
Big, open floors are straightforward with the right equipment. It’s the edges, corners, and around columns that test your patience. Some novices in St. George skip these nuanced areas, hoping that passersby won’t notice. But people do notice. Once the overhead lights or sun’s rays hit those edges, any mismatch in gloss stands out.
Quality polished concrete is seamless. That means you need specialized hand tools or edge grinders to replicate the main floor’s polish level. If you’re going for a uniform finish, set aside adequate time (and the right equipment) to tackle these details.
Practical Tip
Sequential Edge Polishing: Mirror your main grit progression in edge work. If you stop at 800 grit in the corners, do 800 grit in the center. Consistency ensures matching sheen.
Blending Passes: Overlap the main grinder’s path into your hand-grinded edges to smooth out any transition lines.
6) Forgetting Post-Polish Maintenance
You’ve finally arrived at a glassy, gorgeous floor. Now what? One of the biggest mistakes is to neglect a maintenance regimen. Dirt and fine grit can quickly abrade the surface, especially in high-traffic areas. Over time, you’ll see scuffing or a slow decline in reflectivity.
A routine that includes dust mopping and periodic damp mopping keeps loose debris at bay. For those who want to preserve that high-gloss look, periodic burnishing can refresh the surface. And if you’ve applied a stain guard, follow its recommended maintenance schedule. The dryness of St. George might reduce some issues like mildew, but it won’t prevent dust accumulation.
Practical Tip
Set a Schedule: For commercial environments, daily dust mopping is standard. Homeowners might opt for weekly, depending on foot traffic.
Neutral pH Cleaners: Harsh chemicals can undermine the densifier’s bond and dull the shine.
Key Takeaways
Address Moisture: Missing or compromised vapor barriers lead to efflorescence and hinder densifier/stain guard performance.
Mind the Details: Cracks, joints, edges, and corners all require the same care as open floor areas.
Follow the Grit Ladder: Each grit stage refines the surface, so skipping steps is a no-go.
Get Densification Right: Proper timing and uniform application are vital to a hard, bright finish.
Plan for Maintenance: Keep dust and debris off the floor to maintain shine and longevity.
FAQs (10 Questions)
How does St. George’s climate affect polishing?
The dryness can speed up certain steps, but doesn’t eliminate the need to monitor moisture vapor or ensure a solid vapor barrier.Is densifier absolutely necessary?
If you want a harder, more reflective surface with increased abrasion resistance, yes. It’s strongly recommended for most polished concrete projects.Can cracks still form after polishing?
Polishing doesn’t stop concrete’s natural tendency to shrink or crack over time. Proper joint placement and filler application help minimize noticeable cracking.How soon can I walk on newly polished concrete?
Once the final polishing pass is complete, light foot traffic is often okay within a few hours, but always follow manufacturer guidelines for densifier and stain guard cure times.Will humidity alone cause issues?
While St. George is relatively dry, humidity can still interact with any existing moisture in the slab. Testing remains crucial regardless of climate.Do I need protective mats or rugs on polished concrete?
They can help reduce wear in high-traffic zones and catch moisture or debris. Just be sure the mats themselves don’t trap moisture against the floor.Can I polish existing floors with stains or discoloration?
Often, yes. Grinding can remove superficial blemishes. But deep stains may require more aggressive approaches or accept that some coloration remains.How do I handle efflorescence if it appears later?
Efflorescence suggests ongoing moisture migration. You may need to re-test for vapor issues and apply specialized cleaning methods to remove the residue.What grit level is considered ‘high polish’?
Generally, 800 grit and above yields a reflective, glossy surface. Many projects push to 1,500 or even 3,000 for a mirror-like shine.Should I attempt a DIY approach or hire pros?
It depends on your skill set and equipment access. Polishing is labor-intensive and requires a specific skill set. A professional can save time and ensure top-tier results.
Contact Ayala’s Concrete Designs
Location: St. George, UT
Phone: 435-229-7314
Email: [email protected]
Reach out to Ayala’s Concrete Designs for polished concrete advice, repairs, or full-service installations in St. George, UT. We’ll help you avoid every pitfall on this list so your floors shine beautifully for years to come.